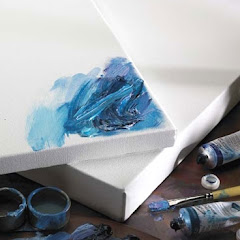
A slightly loose or sagging painting on a Stretched Art Canvas can usually be tightened with the help of bits of wood called canvas tightening keys which are usually supplied with stretched canvas. The keys only need to be wedged into the openings in the corners of the stretcher bars to make the canvas tighter and firmer. Spraying or applying hot water with a sponge to the back of the canvas would also make it tighter. While these methods usually provide good results, canvases sometimes tend to become too loose for these techniques to work. In this case you’d have to re-stretch the canvas.
Points to Consider Regarding Restretching a Painting
Canvases are generally re-stretchable on their original frame. However, you might sometimes have to re-stretch the painting on a smaller frame if there isn’t enough excess canvas left. A smaller stretcher bar frame may be required for the purpose, which may not produce a desirable appearance when displayed. Most stretched canvases though, come with excess canvas that would help restretching on the original frame.
The tools needed for restretching a painting are:
 • A flat-head screwdriver
 • A heavy duty staple gun and staples
• A pair of canvas pliers
• A small hammer (sometimes needed)
Removing the Canvas from the Frame
Restretching a canvas involves firstly removing the canvas from the frame. With the screwdriver, Lever-up the staples at the rear of the canvas. Once all of the staples are removed the canvas can be separated from the frame.
Stretching the Canvas onto the Frame
Place the canvas material on a large work top or on the floor with the painted side down and carefully position the stretcher frame on top making sure the beveled edge is against the back side of the canvas. To check the position of the stretcher frame, briefly pull the canvas up over the edges of the frame one side at a time and reposition the frame slightly if necessary.
Once the frame is in the correct position its time to staple the canvas back onto the frame. Starting midway along the stretcher bar on one side, grab the canvas with the canvas pliers and gently pull the canvas fairly tight and put in the first staple. Working 2 inches either side of the first staple pull the canvas tight with the pliers and put in another staple. You should now have 3 staples in one side of the canvas 2 inches apart. Depending on the quality of the stapler and the hardness of the wood in the stretcher bars, if the staples which you have put in the back of the stretcher frame are slightly raised, tap them in gently with a hammer until they are fully in.
Working on the opposite stretcher bar to the one you have just stapled, repeat the process putting in 3 staples stating form the middle of the stretcher bar, but this time you can pull the canvas tighter with the pliers as you work. Repeat the process again on the two remaining sides placing 3 staples in each side again.
Working along each side, pulling the canvas tightly with the pliers put in staples approximately 2 inches apart all the way along to each corner. If you are stretching a large canvas don’t do all of one side in one go. Instead put in 2 staples and alternate the side you work on. At each corner, neatly fold the edge of the canvas and put in a staple over the folded canvas.
Restretching a painting on stretched canvas is an important task that demands careful attention and precision, especially when it involves finished artwork. But the results of the effort taken are clear for all to see.


